We’ve made Wallery moderation reliable and easy to learn for our users.
In this article, we will show you how to manually moderate your hub after you’re done setting it up, but also how you can make use of our auto-moderator, as well as our lists and profanity filters.
Manual moderation

Step 1: Click on the backdrop in Wallery designer (for example, click on the area marked with a red “X” in the screenshot above.
Step 2: Click on the moderation link circled in red in the above screenshot. You will now be taken into Wallery Moderation panel
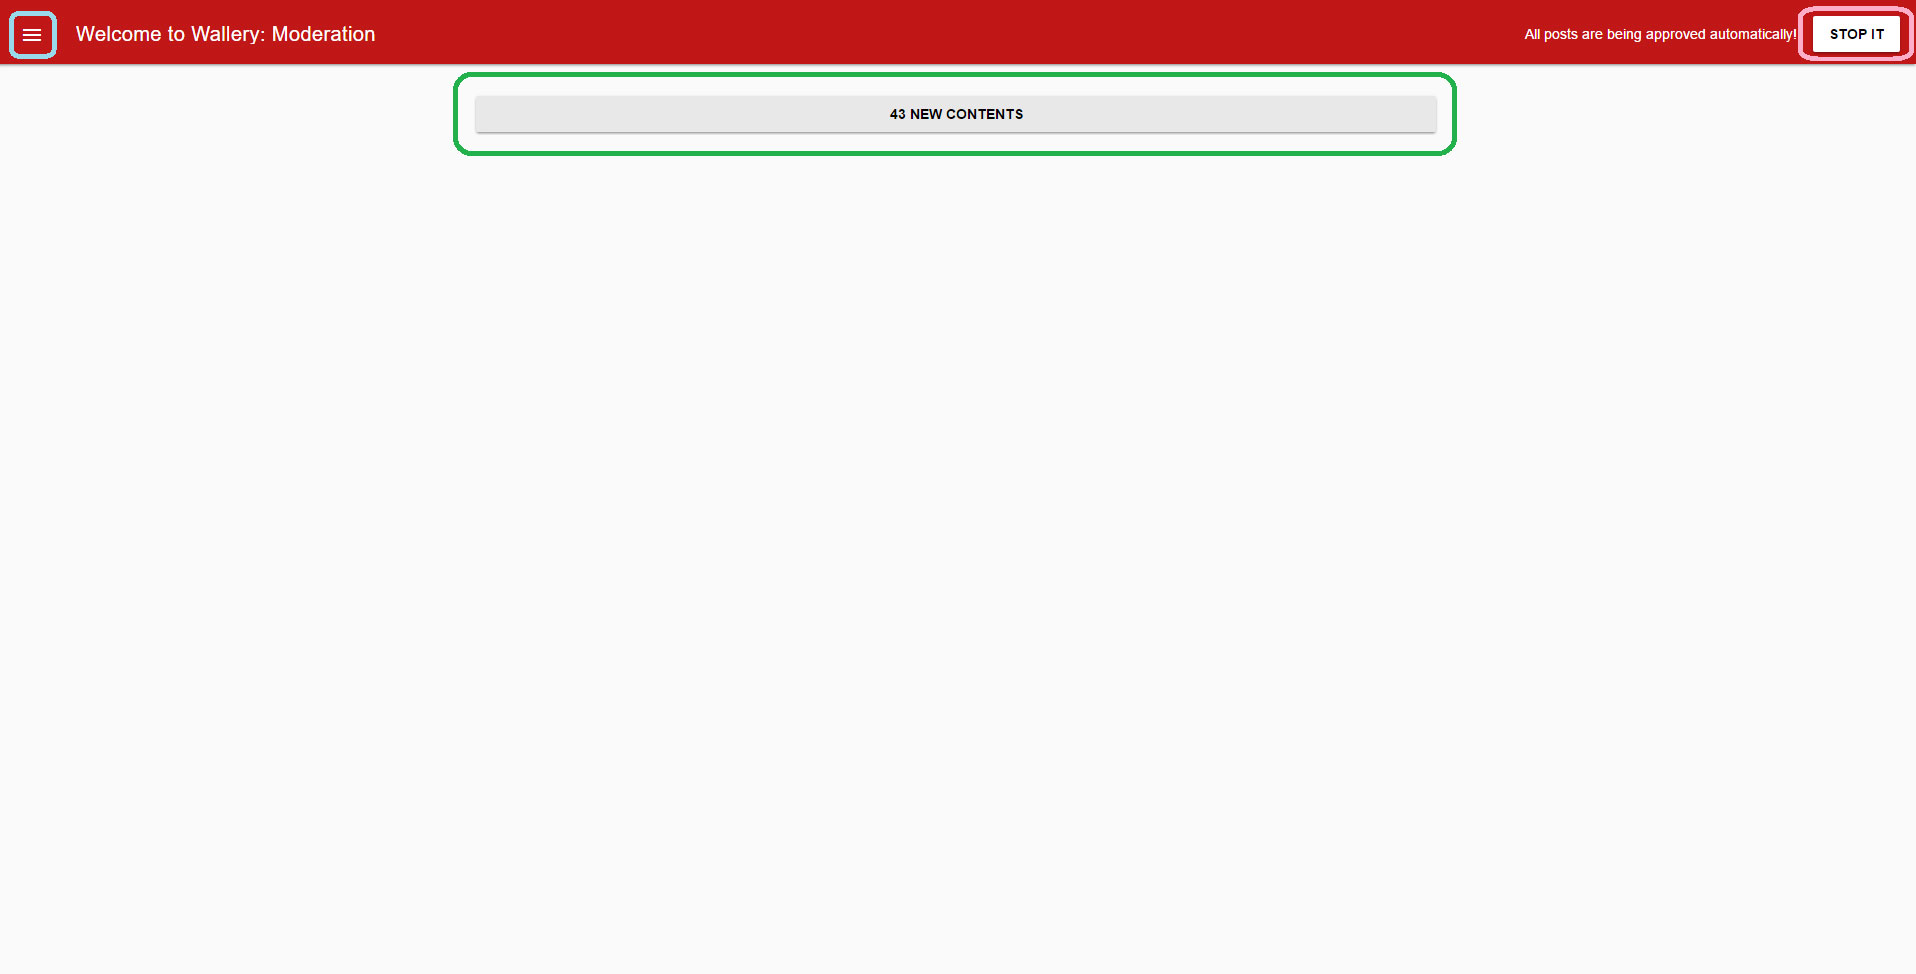
In the above screenshot, you can see the red notification line notifying you that all incoming posts are being approved automatically. This is a default setting and you can turn this off at any time by clicking the “Stop it” button on the right, or by accessing Wallery’s moderation settings.
We are going to disable automatic moderation now and take a look at the moderation options.
Step 3: Click on the gray button telling you how much content is cued up to see the incoming content.
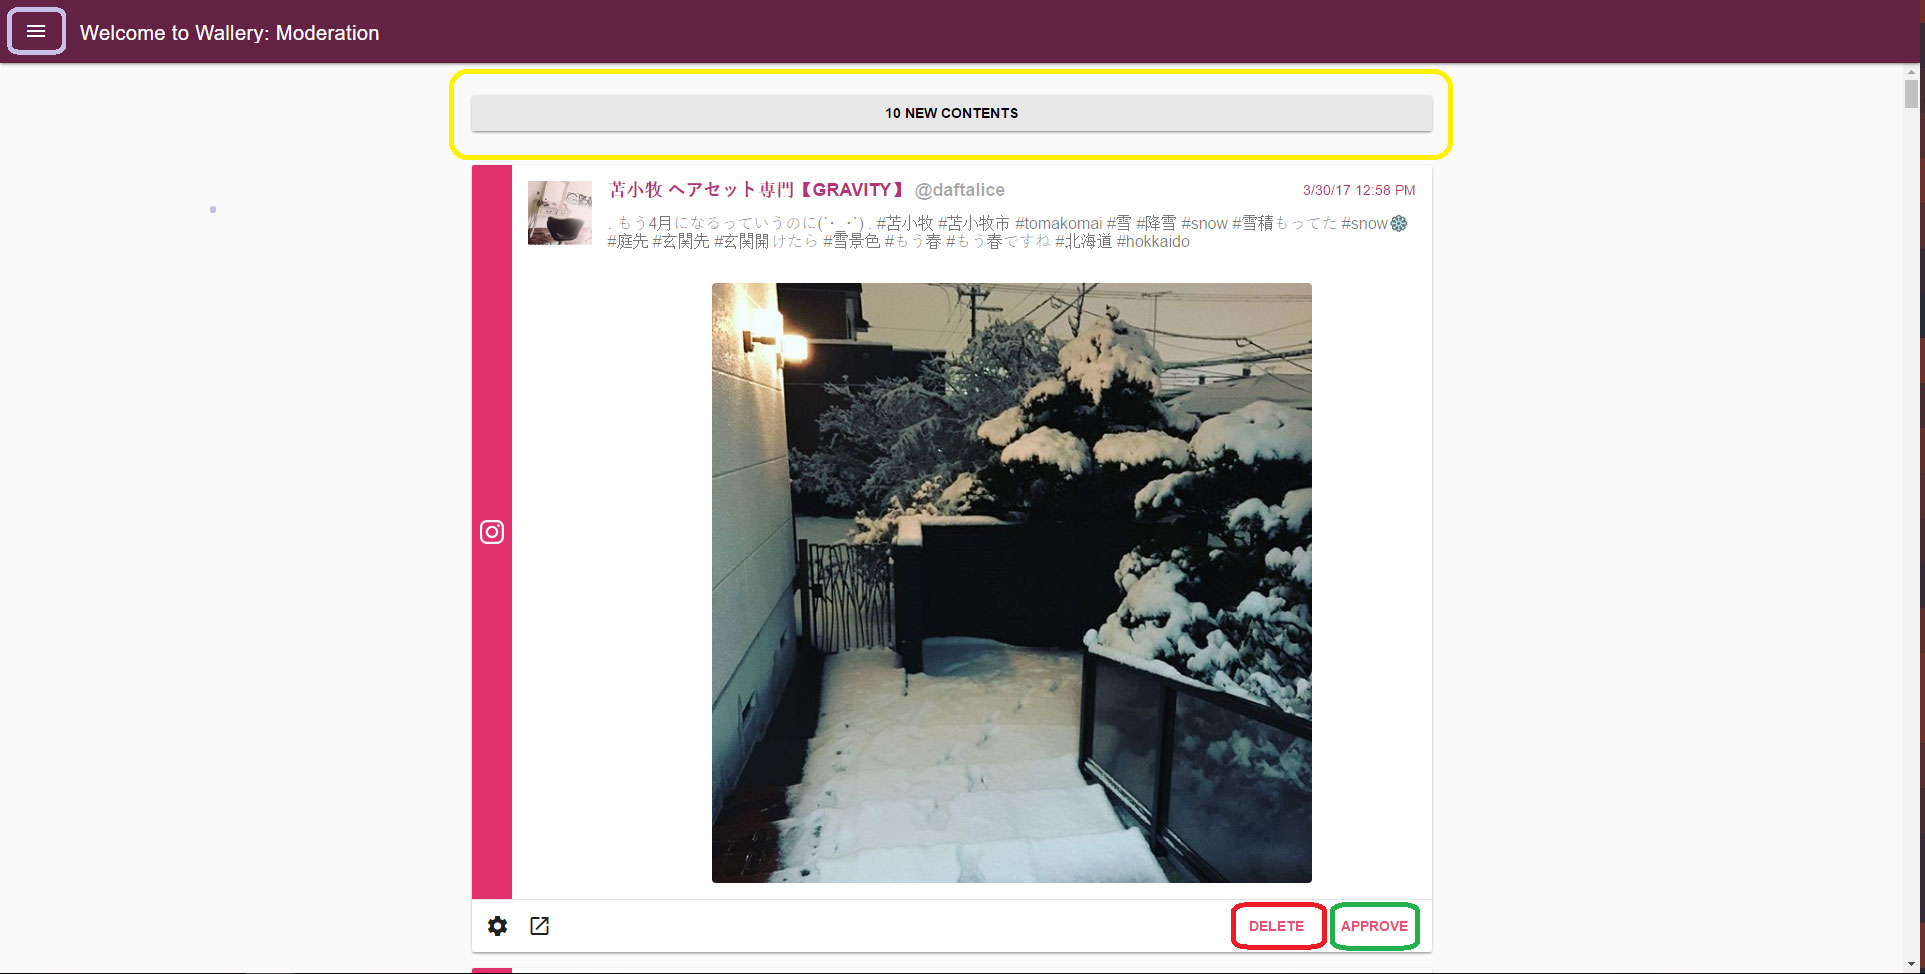
- To display a social media post on your wall or hub, click on the “Approve” button circled green.
- To delete the post from moderation panel completely, click on the “Delete” button circled red.
- To see newer content, click on the “XX New contents” button near the top of the screen, circled yellow.
- To access moderation settings, click on the “☰” icon in the left corner of your screen, circled purple.
Auto-moderation
As we’ve mentioned already, Wallery’s automatic moderator is a default setting when creating a new wall or hub.
If you’ve turned it off and would like to turn it back on simply follow these steps:
Step 1: Access the moderation settings at the top left side of your screen in Wallery Moderation panel by clicking on the “☰” icon.
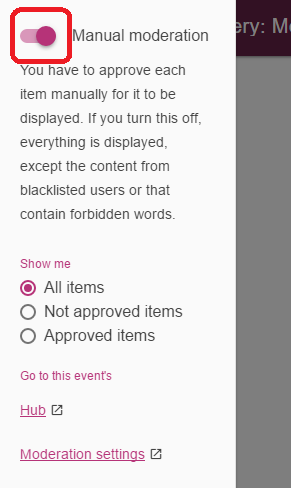
Step 2: Simply tick the “Manual moderation” switch to disable manual moderation.
Step 3: Click anywhere on the screen to return to Moderation panel.
Additional moderation settings
Wallery’s additional moderation settings are here to make moderating your walls and hubs easier for you and your moderators.
We do that by providing you with Lists and profanity filters.
Accessing and creating your Lists
Step 1: From your “Hubs” homepage, you can access your lists by clicking on the “Lists” in the left sidebar.
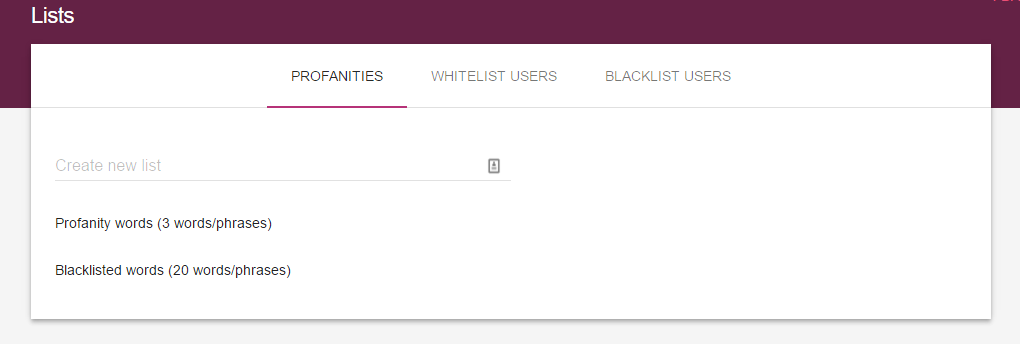
Profanity filters
Step 1: Create a new list, then simply add words and phrases you want to ban from your hubs, placing each new word or phrase into a new line.
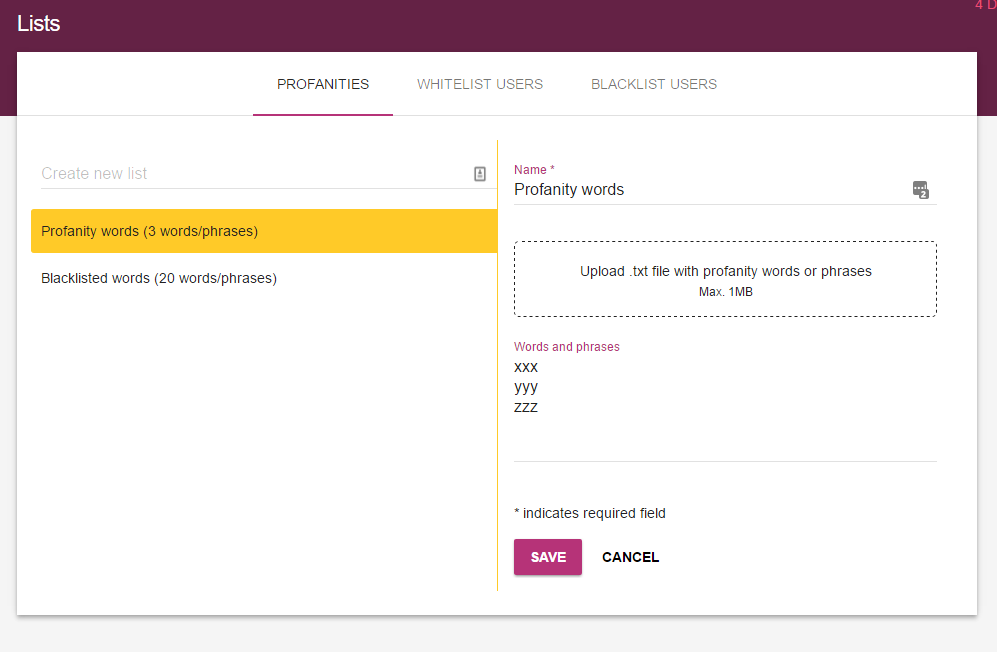
Step 2: Hit “Save” to save your profanity list.
Applying profanity lists
Once they are created, profanity lists are not applied to all of your hubs.
Instead, you have an option to manually apply specific lists to all, or only some of your hubs.
Here is how you can apply a list you’ve created to your hub:
Step 1: Go to your Hubs
Step 2: Enter a hub you want to apply a profanity list to
Step 3: In the upper-left corner, switch to “Moderation settings”.
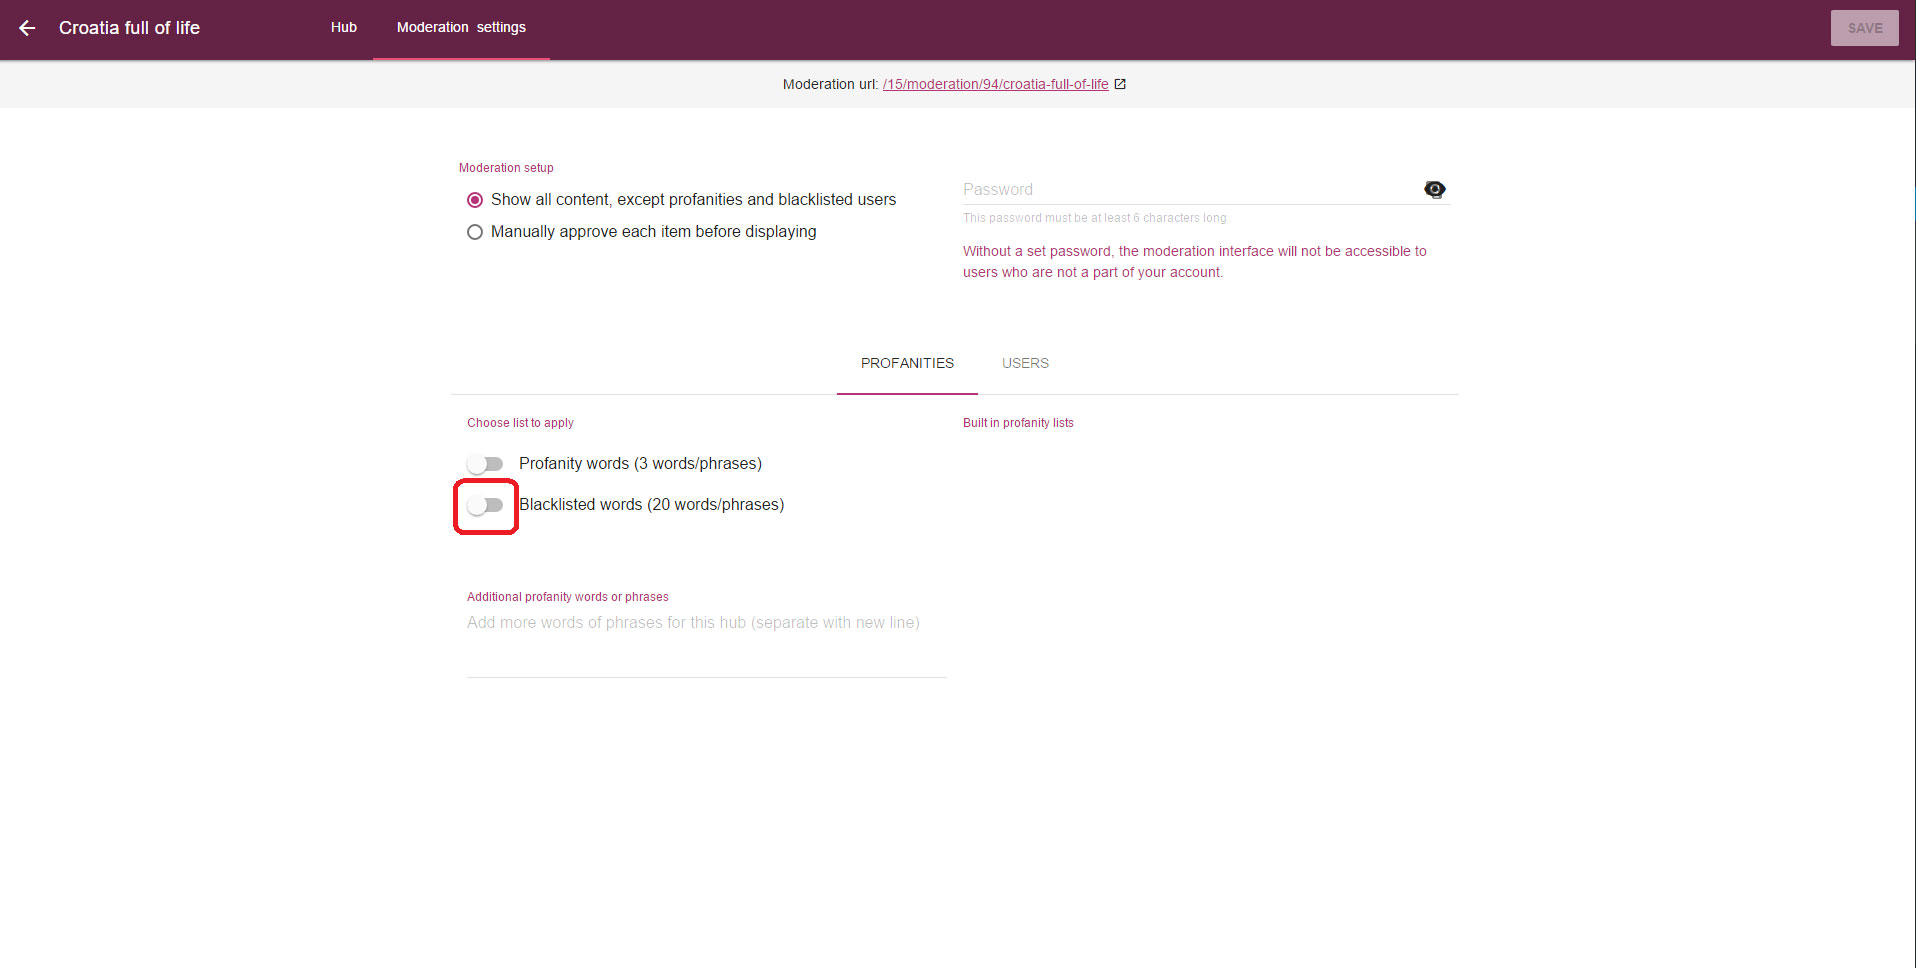
Step 4: Click on the switch next to the list you want to apply to your hub.
Step 5: Hit “Save” in the upper-right corner of your screen.
Your profanity list will now be applied to this hub and any social media posts containing any of the words or phrases on the list will be blocked from showing up on your social media wall.
Whitelists and blacklists
The process of whitelisting and blacklisting users is similar to the one of creating and applying profanity filters.
Step 1: From your main “Hub” screen, go to your “Lists”.
Step 2: Switch to the “Whitelist users” tab.
Step 3: Create a new list.
Step 4: Add username handles of users you’d like whitelisted onto the list, separating each user into a new line.
Step 5: Hit “Save” to save your list.
Step 6: Go into the hub you want to apply the list to.
Step 7: Switch to the “Users” tab.
Step 8: Click on the switch next to the appropriate list to apply the list.
Step 9: Hit “Save” at the top-right corner of the screen.